
Las válvulas de mariposa sanitarias son componentes esenciales en las industrias de alimentos y bebidas, farmacéutica y química, donde la higiene y el saneamiento son fundamentales. Se emplean para controlar el paso de líquidos y gases a través de tuberías con mínima contaminación del material. Su correcta instalación es fundamental para garantizar su eficiencia y el rendimiento esperado. En esta guía, le explicaremos la forma correcta de instalar una válvula de mariposa sanitaria, los tipos de válvulas y los puntos clave a considerar durante la instalación.
1. Comprensión de las válvulas de mariposa sanitarias
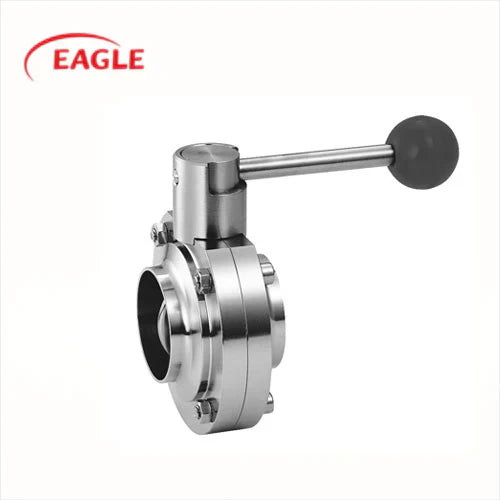
Las válvulas de mariposa sanitarias están diseñadas específicamente para fines higiénicos, es decir, están fabricadas con materiales y características que reducen la vulnerabilidad a la contaminación. Suelen estar fabricadas en acero inoxidable, resistente a la corrosión y fácil de limpiar. La válvula incorpora un disco que gira para regular el flujo de líquido o gas en una tubería.
Su diseño único hace que la válvula de mariposa sanitaria sea compacta y eficiente, ideal para aplicaciones donde válvulas más grandes resultarían incómodas. Las válvulas están disponibles en varios tamaños y formas, según la aplicación, y se utilizan ampliamente en industrias como la producción de leche, la elaboración de cerveza, el tratamiento de agua y la industria farmacéutica.

2. Selección de la válvula de mariposa sanitaria adecuada
Antes de comenzar la instalación, es importante seleccionar la válvula de mariposa sanitaria adecuada para su proceso. Hay varios factores a considerar:
Compatibilidad del material: El material de la válvula debe ser compatible con el fluido que circula por la tubería. El acero inoxidable se utiliza ampliamente en válvulas de mariposa sanitarias por su resistencia a la corrosión, facilidad de limpieza y resistencia a altas presiones.
Tamaño y presión nominal: Asegúrese de que la válvula sea del tamaño correcto para la tubería y la presión de funcionamiento del sistema. Una válvula más pequeña que la tubería o que no sea compatible con la presión correcta podría causar ineficiencia o mal funcionamiento.
Tipo de conexión: Las válvulas de mariposa sanitarias vienen con diversos tipos de conexiones, como tri-clamp, roscadas o soldadas. Elegir el tipo de conexión correcto garantizará una instalación segura y a prueba de fugas.
También es aconsejable comprar válvulas de mariposa sanitarias de un buen proveedor de válvulas de mariposa sanitarias, que pueda proporcionar equipos de primera calidad que cumplan con los estándares de la industria.
3. Preparación para la instalación
Una preparación correcta es lo que garantizará que la válvula funcione como se espera una vez instalada. Los siguientes son los pasos a seguir para una instalación exitosa:
Apague el sistema: antes de instalar la válvula, asegúrese de que la tubería esté despresurizada y que los fluidos o gases se evacuen de manera segura.
Limpieza de tuberías sanitarias: Limpie la tubería para eliminar cualquier suciedad, residuos o residuos acumulados. Esto es especialmente importante en aplicaciones sanitarias, donde la limpieza es fundamental.
Verificación de las piezas de la válvula: Revise la válvula de mariposa sanitaria para detectar daños o defectos. Asegúrese de que todas las piezas estén completas y de que los sellos y juntas de la válvula estén completos.
4. Instalación de la válvula de mariposa sanitaria
Una vez preparado el sistema, puede proceder con la instalación. A continuación, se presenta una guía paso a paso para la correcta instalación de una válvula de mariposa sanitaria:
Paso 1: Posicionamiento de la válvula
Instale la válvula en el centro de las dos secciones de la tubería, asegurándose de que la dirección de flujo marcada en la válvula coincida con la dirección de flujo de la tubería. Esto evitará fallas en la válvula. En válvulas con una marca de dirección de flujo, asegúrese de respetar esta etiqueta.
Paso 2: Asegurar la válvula
Para válvulas de mariposa sanitarias con conexión Tri-Clamp, asegúrese de que las abrazaderas estén montadas con firmeza y precisión. Para conexiones soldadas, asegúrese de que la válvula esté firmemente soldada a los extremos de la tubería. Asegúrese de utilizar técnicas de soldadura adecuadas para evitar espacios que puedan causar fugas.
Para instalaciones de válvulas de mariposa de acero inoxidable con conexiones roscadas , selle la rosca de la tubería con cinta selladora de roscas para lograr un sellado hermético. Apriete las conexiones con una llave para tubos para evitar que se aflojen con el tiempo.
Paso 3: Sellado de la válvula
Asegúrese de que las juntas o sellos estén correctamente asentados entre la tubería y la válvula. Son cruciales para evitar fugas y contaminación. En el caso de las válvulas Tri-Clamp, asegúrese de que la junta esté en buen estado y correctamente centrada a ambos lados de la válvula.
Paso 4: Apretar las conexiones
Una vez que la válvula esté en su posición y las conexiones estén aseguradas, apriete los pernos o las abrazaderas. Para conexiones de triple abrazadera, apriete las abrazaderas uniformemente para evitar deformarlas o crear una presión de sellado desigual. Para conexiones roscadas, asegúrese de que la válvula esté lo más apretada posible sin apretar demasiado, ya que esto dañaría las roscas.
Paso 5: Prueba de la instalación
Después de instalar la válvula, es fundamental revisar el sistema para detectar fugas. Aumente gradualmente la presión en la tubería e inspeccione todas las conexiones para detectar fugas. Apriete las conexiones según sea necesario o reemplace los sellos dañados si detecta alguna fuga.
Paso 6: Inspección final
Una vez instalada la válvula y sin fugas, realice una inspección final para garantizar su correcto funcionamiento. Abra y cierre la válvula manualmente o con un actuador (si está motorizado) y compruebe que se mueve libremente y funciona con suavidad. Asegúrese de que la válvula esté correctamente alineada con la tubería y que la dirección del flujo sea la correcta.
Conclusión
La correcta instalación de válvulas de mariposa sanitarias es fundamental para garantizar el correcto funcionamiento de su sistema de tuberías, especialmente en empresas donde el saneamiento es fundamental. Seleccionar la válvula correcta, preparar el terreno y seguir el procedimiento correcto de instalación le permitirá garantizar una instalación correcta que funcionará durante décadas. Además, comprar a un proveedor de válvulas de mariposa sanitarias de confianza garantiza el uso de materiales de primera calidad que cumplen con los estándares de la industria. El mantenimiento adecuado de sus válvulas también contribuirá a su rendimiento y fiabilidad a largo plazo, convirtiéndolas en una inversión rentable para su empresa.


